After creating and texturing your 3D model in Adobe Substance 3D Painter, the next step is to showcase it in a photorealistic environment using Substance 3D Stager. Painter is where your materials come to life; Stager is where your final render shines.
In this tutorial, you’ll learn how to export textures and materials from Painter, import them into Stager, and apply them to your models for professional-quality visualization and rendering.
👉 Start exploring the full 3D pipeline with the Adobe Substance 3D Collection free trial — which includes Painter, Stager, Designer, Modeler, and Sampler.
🧱 Understanding the Painter-to-Stager Workflow
Substance 3D Painter is designed for texturing — it lets you paint physically based materials (PBR) directly onto your 3D models.
Substance 3D Stager is your final stage — for lighting, layout, and rendering.
Painter handles materials, maps, and smart textures; Stager reads these textures to reproduce accurate light, reflection, and color behavior.
💡 Think of Painter as your “material artist” and Stager as your “photographer.”
🧩 Step 1: Prepare Your Model in Painter
Before exporting to Stager, make sure your asset is finalized in Substance 3D Painter.
- Check Material Assignments
- Each material slot (e.g., metal, glass, leather) should be clearly named.
- Group materials logically by surface type.
- Bake Mesh Maps
- Go to Texture Set Settings → Bake Mesh Maps.
- Bake Normal, AO, Curvature, and World Space maps.
- This ensures your materials display properly in Stager.
- Adjust Resolution
- Set texture resolution to 2048×2048 or 4096×4096 for high-quality exports.
🎯 Pro Tip: Keep the naming structure consistent — for example, Product_BaseColor, Product_Roughness, Product_Normal.
⚙️ Step 2: Export Textures from Painter
Once your materials are ready, export them for Stager.
- Go to File → Export Textures.
- Choose the following settings:
- Output Template:
Substance 3D Stager(or “PBR Metallic Roughness”). - File Type: PNG or EXR for high-quality textures.
- Resolution: 2K or 4K.
- Export Path: Create a folder named
Textures_Stager/.
- Output Template:
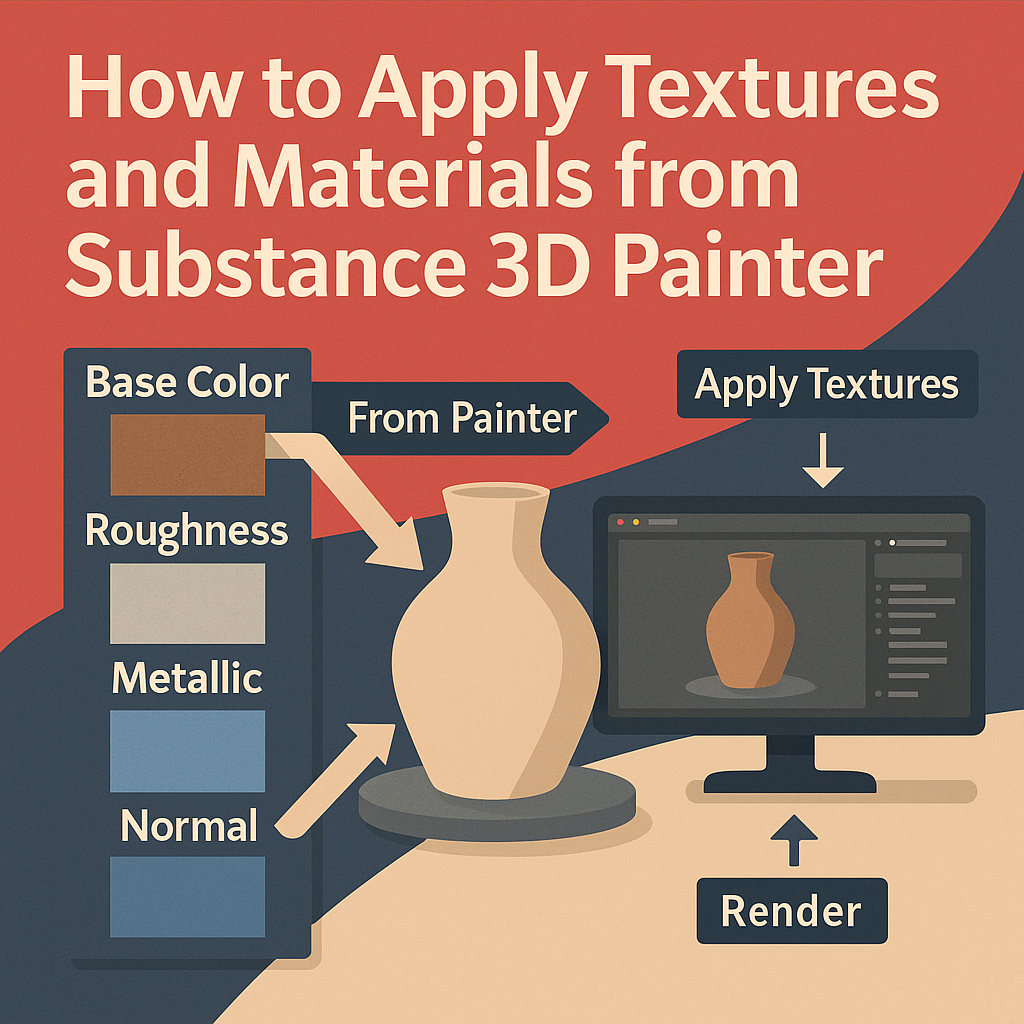
- Painter automatically exports the following maps per material:
- Base Color
- Roughness
- Metallic
- Normal
- Height (optional)
- Opacity (if used)
💡 Workflow Tip: The “Substance 3D Stager” export preset organizes textures so Stager can read and assign them automatically.
🚀 Step 3: Send Directly to Stager (One-Click Method)
The fastest way to transfer materials is through the built-in Send To Stager function.
- In Painter, click File → Send to → Substance 3D Stager.
- Painter automatically:
- Exports the mesh and materials.
- Launches Stager (if not already open).
- Imports the object with textures applied.
🎯 Pro Tip: This method ensures all PBR maps remain correctly linked, saving you manual setup time.
🧱 Step 4: Importing Manually into Stager
If you exported textures separately, you can import them manually:
- Open Adobe Substance 3D Stager.
- Go to File → Import → Model and load your
.FBXor.USDfile. - Select your model and open the Materials Panel.
- Click the Folder Icon beside each texture slot and link the correct map:
- Base Color →
_BaseColor.png - Roughness →
_Roughness.png - Metallic →
_Metallic.png - Normal →
_Normal.png - Opacity →
_Opacity.png(if used)
- Base Color →
💡 Pro Tip: If your maps don’t display properly, verify that the material uses the PBR Metallic/Roughness shader in Stager.
🎨 Step 5: Fine-Tuning Materials in Stager
Once your textures are applied, you can enhance their realism directly in Stager:
Adjust Material Parameters
- Roughness: Controls surface smoothness.
- Metallic: Determines reflectivity for metals.
- Normal Intensity: Adjusts bump depth.
- Opacity: Enables glass, plastic, or translucent materials.
Use Substance Materials
You can also import .sbsar procedural materials from Substance 3D Sampler or Designer and blend them with your Painter textures.
🎯 Example: Combine a base “metal” texture from Painter with a procedural “rust” layer from Designer for aged realism.
🔦 Step 6: Test with Lighting
Lighting reveals how your materials respond under different conditions.
- Add an HDRI environment light for natural illumination.
- Adjust intensity and rotation to find the best highlights.
- Add a spotlight or area light for more focused control.
💡 Workflow Tip: Switch to Path Tracing mode in the Render tab for accurate reflections and light scattering.
🪄 Step 7: Use Texture Variations
Painter allows exporting texture variations (colorways or finishes).
In Stager, duplicate your model and assign different material folders to each:
- Version A: Glossy black finish.
- Version B: Brushed aluminum finish.
- Version C: Matte pastel finish.
🎯 Pro Tip: This is perfect for product designers presenting color options to clients.
📸 Step 8: Rendering Your Textured Model
Now that your materials look perfect, it’s time to render.
- Open the Render Panel.
- Choose Path Tracing for high realism.
- Adjust render resolution (e.g., 1920×1080 or 4K).
- Click Render Image.
💡 Optional: Export as .PSD to add branding, glow, or labels in Photoshop.
✅ Conclusion
Transferring materials from Substance 3D Painter to Substance 3D Stager is a seamless process — enabling you to take your textured creations straight into lighting and rendering with minimal setup. Whether you send directly or import manually, your materials maintain their PBR accuracy, making your final renders both efficient and photorealistic.
👉 Bring your designs to life with the Adobe Substance 3D Collection free trial — your complete suite for 3D modeling, texturing, and rendering.
