Jute is a coarse, natural fiber with a distinctive woven pattern used in bags, rugs, and upholstery. Recreating its organic look inside Adobe Substance 3D Designer is a fantastic way to understand procedural fabric generation — blending weave structure, fibers, and imperfections through nodes.
In this tutorial, you’ll learn how to build a fully procedural jute fabric material from scratch using only nodes. You’ll create a realistic woven pattern, apply rough surface variation, and generate final outputs ready for Substance 3D Painter, Stager, or any PBR render engine.
👉 Try it yourself with the Adobe Substance 3D Collection free trial — it includes Designer, Painter, Sampler, Stager, and Modeler.
🧱 Step 1: Start a New Graph
- Open Substance 3D Designer and create a new Substance Graph (PBR Metallic/Roughness).
- Rename it “Jute_Fabric.”
- Set your graph resolution to 2048×2048 for detailed fibers.
💡 Tip: Start with a uniform graph layout — keep pattern generation on the left, surface detail in the middle, and outputs on the right.
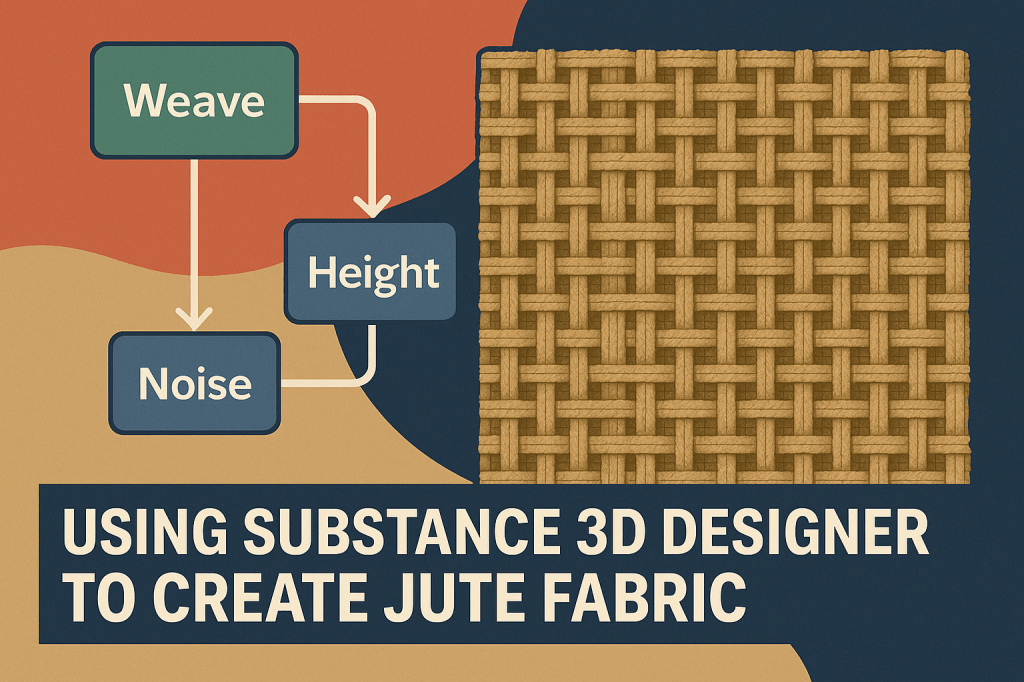
🪡 Step 2: Build the Basic Weave Pattern
The heart of the jute material lies in its interwoven thread structure.
- Add two Tile Generators.
- For the first one, set the Pattern Input to Square and adjust the X/Y amount to create the vertical threads.
- For the second, rotate it 90° to form the horizontal threads.
- Blend both using a Min (Darken) blend mode to simulate interlacing.
🎯 Pro Tip: Add a Directional Warp node between each generator with a subtle noise map to simulate thread irregularities.
🌾 Step 3: Add Fiber Texture and Variation
To make the weave look organic, overlay fine thread-like details.
- Add a Clouds 2 or Fibers 1 node for micro noise.
- Blend it on top of the weave pattern using Overlay mode.
- Adjust opacity to 0.2–0.3 for subtle texture.
- Use a Levels node to enhance the contrast of fiber details.
💡 Tip: Combine Directional Noise 3 with a Warp node to introduce strand breakage and natural inconsistencies.
🎨 Step 4: Generate Height and Normal Maps
- Connect the weave pattern output to a Height Map.
- Use a Normal Map node to convert it — set Intensity between 5–10 for realistic depth.
- Optionally, add a Gaussian Blur before conversion to smooth sharp transitions.
🎯 Pro Tip: Use Gradient Map after your height map to control color zones and add subtle tonal depth.
🧩 Step 5: Create the Base Color (Albedo)
- Add a Gradient Map node and connect it to the main pattern.
- Choose earthy brown tones — jute’s color typically ranges from beige to deep tan.
- For variation, add a Grunge Map 003 multiplied over the base to break uniform color.
💡 Tip: Add a HSL Node at the end so you can easily shift hue and saturation later to create jute variations.
🔩 Step 6: Define Roughness and Ambient Occlusion
- Create a Roughness Map by inverting your fiber pattern — this ensures thread peaks are slightly shinier than gaps.
- Use a Levels node to fine-tune brightness and contrast.
- For Ambient Occlusion, plug your Height Map into an AO Generator node.
🎯 Pro Tip: Keep roughness between 0.6–0.8 for realistic coarse fabric reflection.
🧮 Step 7: Organize and Output
- Add all output nodes — Base Color, Normal, Roughness, Height, and AO.
- Group your node network using Frame Boxes for clarity.
- Save the material as
.sbsar(Substance Archive) for reuse in Painter or Stager.
💡 Workflow Tip: Store procedural parameters such as thread density or color inside Exposed Parameters for easy customization in future projects.
🎥 Step 8: Preview the Material
Switch to 3D View in Designer and assign your jute material to a sphere or fabric plane.
- Adjust lighting using an HDRI map for accurate reflections.
- Tweak the Normal and Height Intensity sliders until the weave feels tactile and realistic.
🎯 Pro Tip: Use Stager’s “Soft Studio Light” preset to see how your jute reacts under product lighting conditions.
✅ Step 9: Export and Apply in Painter or Stager
Once your material looks perfect:
- Export the
.sbsarfile. - In Substance 3D Painter, drag and drop it into your material shelf.
- Apply it to props like bags, rugs, or furniture — instantly realistic results.
💡 Workflow Example: In Substance 3D Stager, apply the jute material to a packaging scene to achieve natural, eco-friendly product visuals.
✅ Conclusion
With just a handful of nodes, you’ve built a fully procedural jute fabric material that’s endlessly customizable. From eco packaging to interior renders, this workflow can be adapted to any woven surface.
👉 Experiment with weave density, noise levels, and gradient hues — or explore the Adobe Substance 3D Collection free trial to expand your library of realistic materials.
