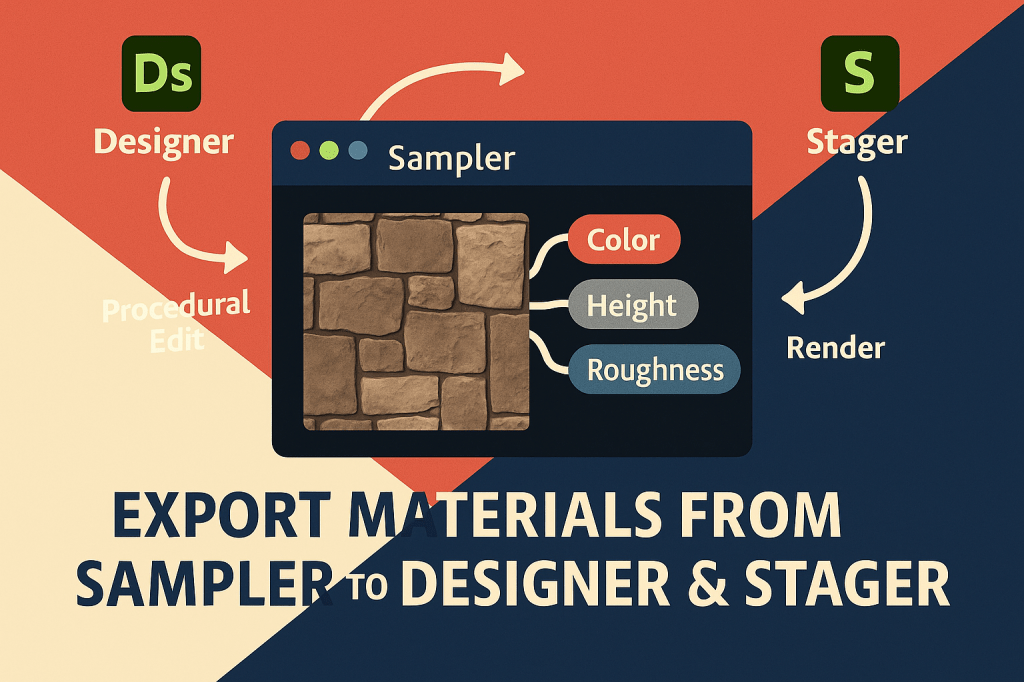
One of the most powerful advantages of Adobe Substance 3D Sampler is its seamless integration with other tools in the Substance 3D Collection — especially Substance 3D Designer and Substance 3D Stager.
Sampler helps you build or capture realistic materials, but Designer and Stager are where those materials come alive — Designer for procedural material authoring, and Stager for 3D rendering and visualization.
In this tutorial, you’ll learn exactly how to export materials from Sampler to Designer or Stager, preserving all PBR maps and metadata for a flawless transition between apps.
👉 Start experimenting with this workflow using the Adobe Substance 3D Collection free trial — which includes Sampler, Designer, Painter, and Stager.
🧠 Understanding the Workflow
Here’s how these apps fit together in your 3D material pipeline:
- Sampler → Captures or generates realistic, photo-based materials.
- Designer → Builds complex, procedural materials using nodes.
- Stager → Applies those materials to 3D scenes and lights them for rendering.
💡 Think of Sampler as your texture lab, Designer as your code editor, and Stager as your photo studio.
🧱 Step 1: Create or Import a Material in Sampler
- Open Adobe Substance 3D Sampler.
- Either:
- Import a surface photo using Image to Material (AI-powered), or
- Create a procedural material using filters, layers, and adjustments.
- Tweak the material’s channels (Base Color, Roughness, Height, Normal, AO) for a polished look.
🎨 Pro Tip: Use high-resolution images and fine-tuned roughness values for better export results — especially for rendering in Stager.
💾 Step 2: Export as a Substance Archive (.SBSAR)
The .SBSAR format is the universal bridge between Sampler, Designer, Painter, and Stager.
- Once your material is ready, go to the top menu → Share → Export As → SBSAR File.
- Choose a location in your local library or Creative Cloud storage.
- Optional: Click Exposed Parameters to define adjustable controls (e.g., roughness, hue, scale) for flexibility in other apps.
- Click Export.
💡 Workflow Tip: The SBSAR file automatically includes all essential PBR maps (Base Color, Normal, Height, Roughness, AO, Metallic, and Emissive if available).*
🧩 Step 3: Import into Substance 3D Designer
If you want to enhance your material procedurally:
- Launch Substance 3D Designer.
- Go to File → New → Substance Graph, or open an existing project.
- Drag your
.SBSARfile from the file explorer directly into the graph. - Designer automatically creates an Instance Node of your material.
Now you can:
- Combine your Sampler material with procedural nodes (e.g., noise, pattern, blend).
- Add additional PBR outputs or modify parameters.
- Save your enhanced graph as a new
.SBSARfor reuse in Painter or Stager.
🎯 Pro Tip: Use Sampler for realistic photo-based materials, then expand on them in Designer using procedural techniques like dirt masks or surface blending.
🪄 Step 4: Export for Substance 3D Stager
If your goal is to render your material in a lighting environment, export your Sampler material for Substance 3D Stager instead:
- In Sampler, click Share → Send to → Substance 3D Stager.
- If Stager is installed, the app will open automatically.
- Your material appears in the Assets panel under Materials → Imported.
- Drag and drop it directly onto your 3D object.
Alternatively, you can manually import the SBSAR file into Stager:
- Open Stager → Assets Panel → Materials Tab → + Import Material.
- Select your exported
.SBSAR. - Apply it to your 3D model in the viewport.
🎨 Workflow Tip: You can also adjust material parameters in Stager (scale, rotation, roughness, tint) — all based on the properties exposed in Sampler.
🌇 Step 5: Adjust and Light Your Scene in Stager
Once your material is applied:
- Adjust tiling and UV scale under the Material Properties panel.
- Fine-tune Roughness and Normal Intensity for realistic light behavior.
- Experiment with HDR environments for lighting variety (Studio, Outdoor, Sunset, etc.).
- Render a preview using Ray Tracing for full PBR fidelity.
💡 Pro Tip: Combine materials from Sampler with Stager’s physical lights and shadow settings to create portfolio-ready visuals.
⚙️ Step 6: Optional – Export as Individual Texture Maps
If you need more control or want to integrate into other 3D tools:
- In Sampler, go to Share → Export As → Textures.
- Choose output maps (Base Color, Height, Normal, Roughness, AO, Metallic).
- Select file format (PNG, TIFF, EXR) and resolution (2K–8K).
- Import these texture maps manually into Designer, Stager, or any 3D software like Blender or Unreal Engine.
🎯 Workflow Tip: For custom materials with multiple outputs, exporting textures gives you flexibility beyond Adobe’s apps.
🧠 Step 7: Maintain Consistency Across the Pipeline
To keep your material library organized:
- Store all exported
.SBSARand texture files in a dedicated folder. - Use consistent naming like
Wood_Oak_01_Sampler.sbsarorStone_Brick_02_PBR.zip. - Tag your materials by category (fabric, metal, stone, organic).
💡 Bonus Tip: Add metadata and thumbnails for easier browsing inside Designer and Stager libraries.
✅ Conclusion
By exporting materials from Substance 3D Sampler to Designer or Stager, you unlock the full power of Adobe’s 3D ecosystem — combining Sampler’s intuitive realism, Designer’s procedural control, and Stager’s professional rendering tools.
👉 Get started today with the Adobe Substance 3D Collection free trial and discover how effortless material creation and rendering can be.
