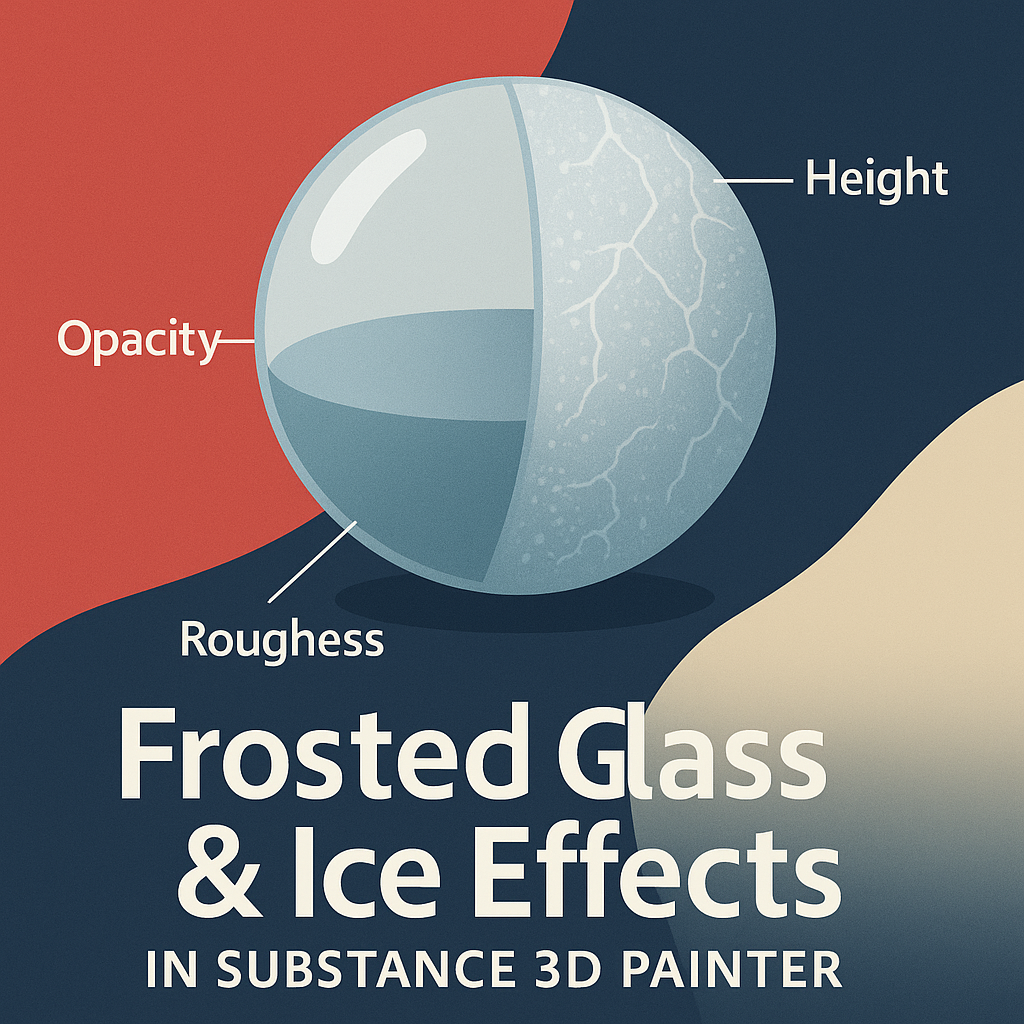
Frosted glass and icy surfaces bring elegance and atmosphere to 3D design — from cold beverage bottles to frozen landscapes. In Adobe Substance 3D Painter, you can recreate these translucent, frosty effects by controlling roughness, opacity, and height in your materials.
This tutorial walks you through how to simulate realistic glass frost and ice buildup, whether for product visualization or environmental design.
👉 Follow along using a free trial of the Adobe Substance 3D Collection and add cool realism to your next 3D project.
🧱 Step 1: Start with a Glass Base
- Open your 3D model in Substance 3D Painter.
- Apply a Smart Material like Glass Clear or create a custom one by setting:
- Base Color: Neutral gray (RGB 128,128,128)
- Metallic: 0
- Roughness: 0.05–0.1
- Opacity: 0.05–0.2 (for transparency)
- Enable the Opacity Channel (Shader Settings → Channels → + → Opacity).
💡 Tip: Use the PBR – Metal Rough with Alpha Blending shader to view transparency correctly.
❄️ Step 2: Add Frost or Ice Layer
- Add a new Fill Layer above your base glass.
- Disable Metallic, enable Roughness, Height, and Color.
- Pick a light blue-gray Base Color to simulate frost tint.
- Increase Roughness to 0.8–0.95 to create the blurred, diffused look of frosted glass.
🎯 Pro Tip: Frosted areas scatter light — focus on realistic blur rather than opacity.
🧩 Step 3: Mask the Frost Pattern
- Right-click your frost layer → Add Black Mask.
- Add a Generator → Moisture Leaks or Clouds 2.
- Adjust:
- Balance for frost density
- Contrast for edge sharpness
- Grunge Amount for randomness
- Use Blur Filter in the mask for smooth transitions between clear and frosted areas.
💡 Optional: Add a Paint Layer on top of the mask to manually reveal patterns or ice streaks.
🧊 Step 4: Add Ice Cracks and Buildup
- Add a Height-only Fill Layer.
- Use Grunge Cracks or Frosted Veins procedural textures as masks.
- Increase Height slightly (+0.05) for raised ice ridges.
- Lower Roughness in those regions to make them look semi-polished.
🎨 Pro Tip: Combine multiple crack textures at different scales for a more natural frozen effect.
🌨️ Step 5: Add Condensation (Optional)
For cold glass effects (like a drink or window):
- Add another Fill Layer with Roughness and Height.
- Mask it with Grunge Droplets or Water Condensation texture.
- Set Height = +0.02 for droplet buildup.
💡 This small detail adds realism to close-up renders.
🔦 Step 6: Lighting and Preview Setup
- Go to Display Settings → Environment Map → Cold Studio or Outdoor Winter Light.
- Adjust Environment Exposure to +0.5 for brightness.
- Enable Tone Mapping → ACES and Subsurface Scattering (SSS) for realistic light diffusion.
🧠 Pro Tip: Reduce HDRI contrast for soft lighting that enhances the translucent quality of frost.
💾 Step 7: Export for Rendering
- Go to File → Export Textures.
- Use the PBR Metallic Roughness with Alpha template.
- Export in 4K resolution for detailed frost diffusion.
Import your textures into Blender, Unreal Engine, or Adobe Stager for realistic, refractive results.
✅ Conclusion
Frosted glass and ice surfaces add subtle sophistication and natural realism to any scene. With Adobe Substance 3D Painter, you can simulate the complex behavior of light through frozen materials — all while keeping full control over translucency and texture detail.
👉 Try it today with the Adobe Substance 3D Collection free trial and start crafting cool, crystal-like surfaces with Painter.
