Fabric materials are among the most rewarding — and challenging — to recreate in 3D. The subtle weave, thread direction, sheen, and fiber irregularities determine whether a fabric looks soft, synthetic, or coarse. With Adobe Substance 3D Designer, you can craft these characteristics procedurally, achieving photorealistic textiles that can be endlessly customized.
In this tutorial, we’ll explore how to build a procedural fabric material using node-based workflows in Designer — focusing on weave structure, pattern control, and roughness maps that define how light interacts with the surface.
👉 Start building along with a free trial of the Adobe Substance 3D Collection and discover how to simulate cloth realism entirely from nodes.
🧠 Understanding Procedural Fabric Design
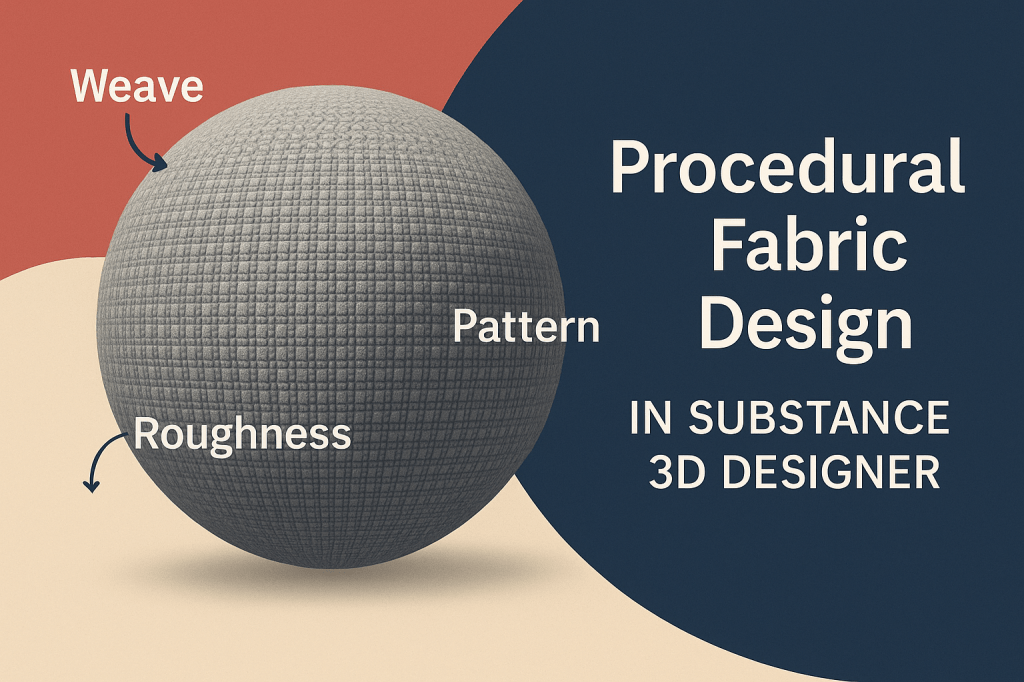
Fabric realism depends on three key surface factors:
- Weave Structure – The pattern of interlaced threads (e.g., plain, twill, satin).
- Pattern Overlay – Decorative color or print layered on top of the weave.
- Roughness Variation – Determines sheen and how threads reflect light.
By designing these procedurally, you can simulate cotton, silk, denim, burlap, or synthetic fabrics with full control and zero image-based limitations.
🧵 Step 1: Set Up the Base Graph
- Open Adobe Substance 3D Designer.
- Go to File → New Substance Graph → select Physically Based (Metallic/Roughness).
- Name your graph Procedural_Fabric_Base.
Add standard PBR outputs:
- Base Color
- Roughness
- Normal
- Height
- Ambient Occlusion
🎯 Pro Tip: Keep both 2D and 3D views open — subtle changes in weave intensity appear best under angled lighting.
🧱 Step 2: Create a Weave Pattern
Let’s simulate a plain weave (the most common textile structure).
- Add a Shape node → set to Square.
- Connect it to a Tile Sampler node.
- Set Pattern → Square, and adjust:
- X Amount: 32
- Y Amount: 32
- Pattern Scale: 0.9
- Add a Transformation 2D node → rotate by 45° for a diagonal weave orientation.
- Duplicate the layer and offset it slightly to create interlacing threads.
- Blend both using a Max (Lighten) Blend node to merge.
💡 Workflow Tip: For alternative weaves like twill or herringbone, use Directional Warp or FX-Map nodes for angled thread offsets.
🎨 Step 3: Add Height and Depth
- Add a Levels node to fine-tune the grayscale contrast of your weave pattern.
- Connect it to a Height Map Output.
- Add a Normal Map node and connect it as well — this will simulate thread elevation.
- Subtly adjust Normal Intensity (5–10) to preserve a soft surface.
🎯 Pro Tip: In fabrics, depth comes from microstructure — avoid large height jumps for realism.
🧩 Step 4: Introduce Roughness Variation
Roughness defines how light scatters on fibers.
- Add a Noise node (e.g., Clouds 2 or BnW Spots).
- Blend it with the weave pattern using a Multiply node.
- Connect to the Roughness Output.
- Adjust Levels until you achieve realistic highlights — shiny threads for silk, matte for cotton.
💡 Bonus: Use Directional Noise for brushed fabric or velvet-like anisotropy.
🪡 Step 5: Add Color and Pattern Layers
- Add a Gradient Map to colorize your weave pattern.
- Choose natural fiber tones (light beige, gray, or indigo).
- To add printed designs:
- Import a Pattern Texture (e.g., stripes, floral, geometric).
- Use a Blend → Overlay node to merge it with the base color.
- For dyed or worn effects, add a Grunge Map and blend at low opacity.
🎨 Pro Tip: Use Mask Random in the Tile Sampler to assign slightly different colors to each thread for realism.
🧶 Step 6: Refine the Fabric Detail
- Add a Warp node to subtly distort the weave (simulating stretched threads).
- Add a Curvature node from your Height output to enhance lighting on thread edges.
- Blend Curvature with Base Color using a Soft Light Blend node for visual depth.
- Add an Ambient Occlusion (AO) node from Height for shadowing between threads.
💡 Workflow Tip: AO depth helps separate individual threads visually under lighting.
🪣 Step 7: Test and Adjust in Lighting
- In the 3D view, apply a Studio Soft Light HDRI.
- Rotate lighting to test highlights and shadow interplay.
- Tweak Roughness, Normal Intensity, and Warp Strength until the fabric feels tactile.
🎯 Pro Tip: For silky fabrics, reduce roughness and increase weave contrast. For denim or burlap, raise roughness and add more noise.
💾 Step 8: Export or Reuse the Material
Once satisfied:
- Connect all outputs — Base Color, Normal, Roughness, Height, AO.
- Save your project.
- Right-click your graph → Publish .SBSAR File for reuse in:
- Substance 3D Painter
- Substance 3D Stager
- Blender, Unreal Engine, or Unity.
🎨 Bonus: Expose parameters like Thread Scale, Color Tint, or Weave Type for reusable flexibility.
✅ Conclusion
With Adobe Substance 3D Designer, procedural fabric design becomes both artistic and technical. By controlling weave patterns, roughness, and depth procedurally, you can simulate any textile with physically accurate light behavior — perfect for fashion, product design, or interior visualization.
👉 Try the Adobe Substance 3D Collection free trial and start crafting your own digital fabrics from scratch.
